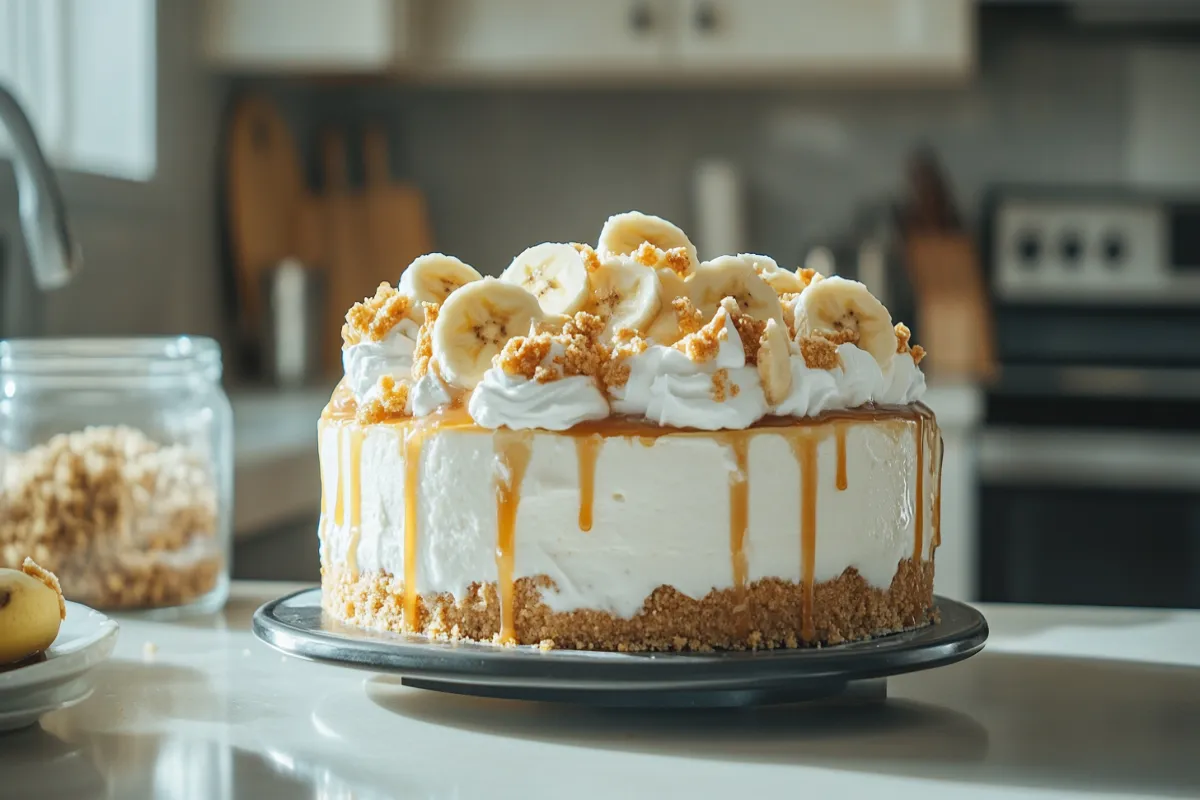
Introduction: No-Bake Banana Pudding Cheesecake – A Dreamy No-Fuss Dessert
Ever had one of those days where you’re craving something sweet but just can’t deal with turning on the oven? Yep, me too! That’s why this no-bake banana pudding cheesecake is an absolute game-changer. It’s creamy, dreamy, packed with banana flavor, and best of all—zero baking required.
This dessert combines two all-time favorites: the classic Southern banana pudding and the rich, velvety goodness of cheesecake. The result? A smooth, no-bake cheesecake with layers of banana, a crunchy vanilla wafer crust, and a luscious pudding-infused filling that melts in your mouth. Trust me, one bite and you’ll be hooked!
In this guide, I’ll walk you through everything you need to know to make the perfect no-bake banana pudding cheesecake, from the best ingredient swaps to foolproof tips for getting that perfect, silky texture. Oh, and I’ve even got some fun topping ideas to take it to the next level! Let’s get started!
Ingredients: Everything You Need for the Perfect No-Bake Banana Pudding Cheesecake
Now, let’s talk ingredients! The best part? You probably already have most of these in your kitchen. No fancy tools or complicated steps—just simple, delicious goodness in every bite.
Crust: The Crunchy Base
| Ingredient | Quantity | Notes |
|---|---|---|
| Vanilla wafers | 2 cups (crushed) | Graham crackers work too! |
| Unsalted butter | 6 tbsp (melted) | Helps bind the crust together. |
Cheesecake Filling: The Creamy Goodness
| Ingredient | Quantity | Notes |
|---|---|---|
| Cream cheese | 16 oz (2 blocks) | Use full-fat for the creamiest texture. |
| Granulated sugar | ½ cup | Adjust for sweetness preference. |
| Heavy cream | 1 cup | Whipped to stiff peaks for fluffiness. |
| Banana pudding mix | 1 small box (3.4 oz) | Instant mix works best! |
| Whole milk | 1 cup | For mixing the pudding. |
| Vanilla extract | 1 tsp | Adds depth of flavor. |
| Fresh bananas (Benefits) | 2 large (sliced) | Adds fresh banana flavor. |
Toppings: The Finishing Touch
| Ingredient | Quantity | Notes |
|---|---|---|
| Whipped cream | 1 cup | Store-bought or homemade. |
| Crushed vanilla wafers | ½ cup | For a little extra crunch. |
| Banana slices | 1 banana | Add just before serving to prevent browning. |
| Caramel sauce | Drizzle | Optional, but highly recommended! |
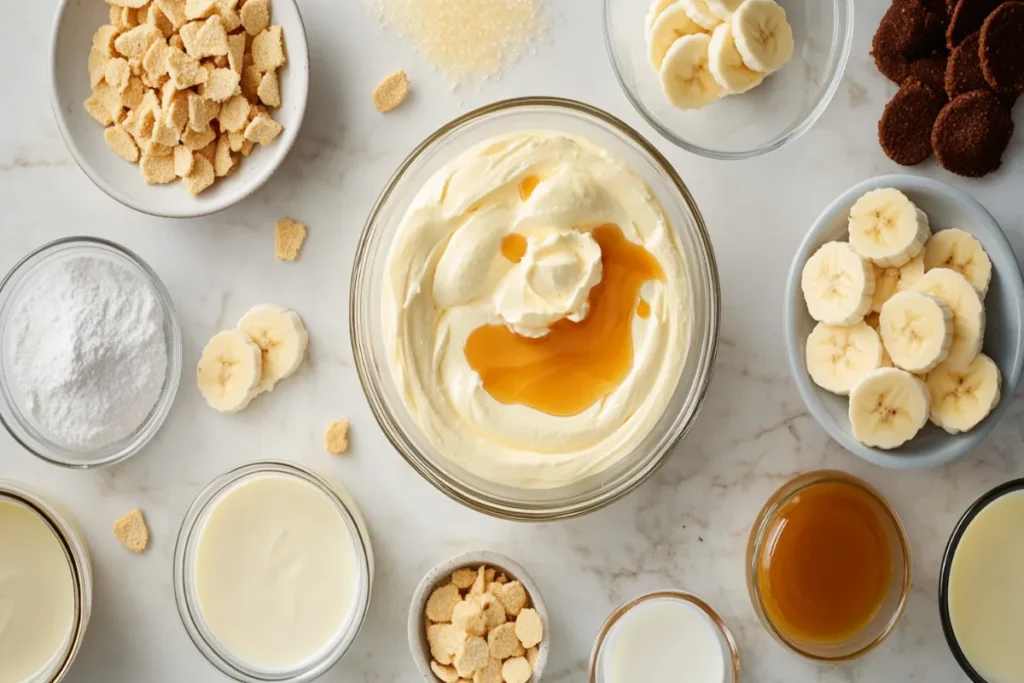
Pro Tip: If you want to keep those banana slices from turning brown, toss them in a little bit of lemon juice before adding them to the cheesecake. No one wants a brown banana topping, right?
Now that we’ve got all the ingredients ready, let’s move on to the best part—putting it all together!
Step-by-Step Guide for No-Bake Banana Pudding Cheesecake
If you’re ready to make the creamiest, dreamiest no-bake banana pudding cheesecake, you’re in the right place! Follow this simple step-by-step guide, and you’ll have a delicious dessert that’s ready to impress—without even touching the oven.
Step 1: Prepare the Crust
First things first, let’s get that crunchy vanilla wafer crust ready!
- Crush the Vanilla Wafers: Place the wafers in a food processor and pulse until they turn into fine crumbs. No food processor? No problem! Just put the cookies in a ziplock bag and crush them with a rolling pin.
- Mix with Melted Butter: Transfer the crumbs to a mixing bowl and pour in melted butter. Stir until everything is well combined, and the texture feels like wet sand.
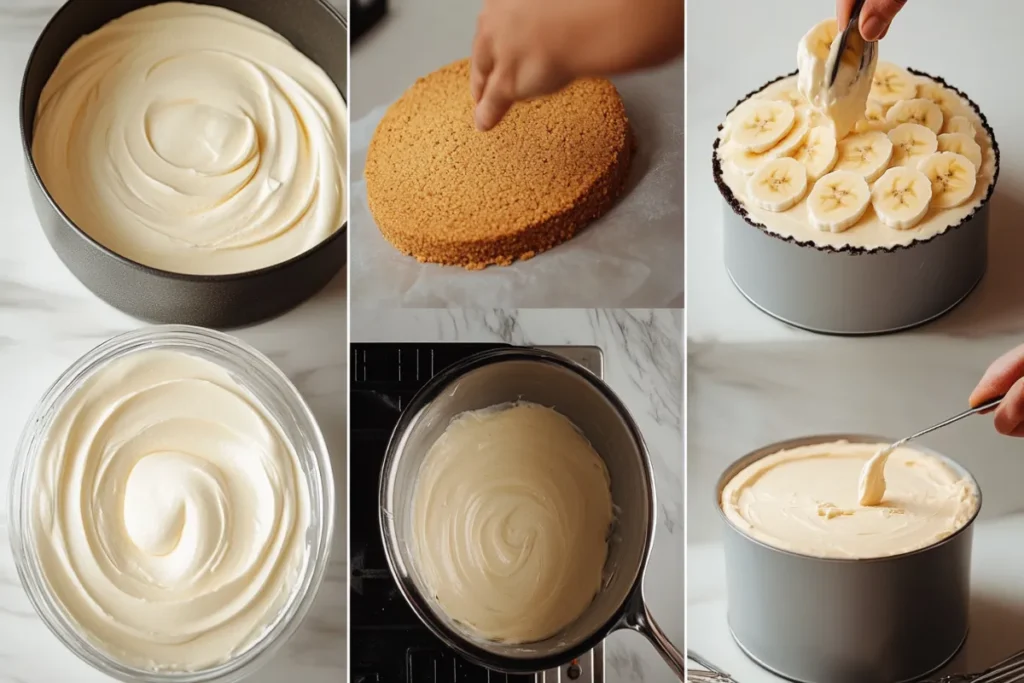
- Press into the Pan: Pour the crumb mixture into a 9-inch springform pan. Using the back of a spoon, firmly press it down to create an even base.
- Chill the Crust: Pop the pan into the fridge for at least 30 minutes to let the crust set. This step is key to making sure your cheesecake holds its shape!
Pro Tip: Want an extra layer of flavor? Add a pinch of cinnamon to the crust mixture for a subtle warmth.
Step 2: Make the Banana Pudding Cheesecake Filling
Now for the star of the show—the silky, banana-infused cheesecake filling!
- Beat the Cream Cheese: In a large bowl, beat the cream cheese with an electric mixer until smooth and fluffy. No lumps allowed!
- Add Sugar and Vanilla: Pour in sugar and vanilla extract, then continue mixing until well combined.
- Prepare the Banana Pudding: In a separate bowl, whisk together the banana pudding mix and milk until it thickens. Let it sit for 5 minutes to fully set.
- Fold in the Whipped Cream: Gently fold in whipped cream (or Cool Whip) to keep the mixture light and airy.
- Combine Everything: Finally, add the prepared pudding into the cream cheese mixture and stir until smooth.
- Add Banana Slices: Thinly slice fresh bananas and fold them into the mixture for a burst of natural banana flavor.
Pro Tip: To prevent bananas from turning brown, toss them in a little lemon juice before adding them to the filling.
Step 3: Assemble and Chill the Cheesecake
You’re almost there! Now it’s time to bring everything together.
- Pour the Filling Over the Crust: Take your chilled crust out of the fridge and gently spread the cheesecake filling over it. Use a spatula to smooth out the top.
- Cover and Refrigerate: Place plastic wrap over the pan and refrigerate for at least 4 hours (overnight is even better). This step lets the flavors meld and the cheesecake firm up properly.
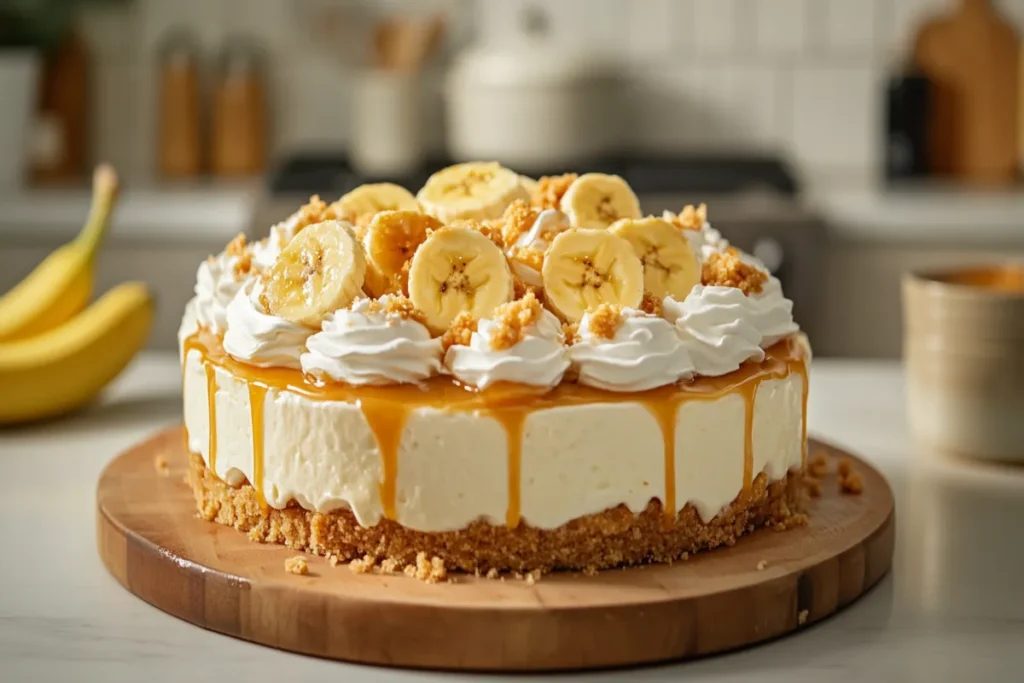
- Top It Off: Before serving, decorate with whipped cream, extra banana slices, and crushed vanilla wafers for a stunning finish.
Pro Tip: Don’t add banana slices on top until right before serving—this keeps them fresh and prevents browning.
Once it’s fully chilled, grab a fork and dig into your perfect no-bake banana pudding cheesecake! Trust me, it’ll be love at first bite.
Tips and Tricks for Perfecting No-Bake Banana Pudding Cheesecake
Want to take your no-bake banana pudding cheesecake to the next level? Follow these expert tips to make sure it turns out flawless every time!
Tip 1: Use Full-Fat Ingredients for the Best Texture
When making no-bake cheesecake, fat content matters!
- Always use full-fat cream cheese—this gives your cheesecake a rich, creamy texture.
- Go for heavy whipping cream instead of low-fat versions to keep the filling smooth and firm.
- If you need a lighter option, try Greek yogurt in place of some cream cheese, but don’t skip the full-fat version entirely!
Why? The fat content helps the cheesecake hold its shape and keeps it from getting too soft.
Tip 2: Give It Plenty of Time to Chill
No shortcuts here—chilling is key!
- 4 hours is the minimum, but overnight chilling gives the best results.
- The longer it chills, the better the flavors develop and the firmer the texture.
- If you’re in a hurry, you can pop it in the freezer for 30 minutes, but don’t leave it too long or it’ll get icy!
Pro Tip: Planning to serve this for a party? Make it a day ahead so it has plenty of time to set!
Tip 3: Prevent Bananas from Turning Brown
Nobody wants brown, mushy bananas ruining their cheesecake!
- Use firm, ripe bananas (avoid overly ripe ones—they get too soft).
- Toss banana slices in a little lemon or pineapple juice to slow down browning.
- Layer the bananas inside the filling instead of placing them on top too early.
Bonus Hack: If you must decorate early, brush the banana slices with a thin layer of honey—it helps prevent oxidation!
Tip 4: Experiment with Fun Flavor Twists
Want to put your own spin on this classic? Try these fun variations:
- Chocolate Banana Cheesecake: Add a layer of melted chocolate ganache on top.
- Peanut Butter Banana Twist: Swirl peanut butter into the filling for a rich, nutty flavor.
- Caramel Banana Delight: Drizzle with caramel sauce and sprinkle with sea salt for a gourmet touch.
- Oreo Banana Cheesecake: Swap vanilla wafers for crushed Oreos in the crust!
No matter how you make it, this no-bake banana pudding cheesecake is guaranteed to be a hit!
Now that you know all the secrets to making the perfect no-bake banana pudding cheesecake, it’s time to get in the kitchen and make it happen! Enjoy every creamy, banana-filled bite!
Serving and Garnishing No-Bake Banana Pudding Cheesecake
Now that your no-bake banana pudding cheesecake is perfectly set, it’s time to serve it like a pro! A great presentation not only makes your dessert look amazing but also enhances the flavors. Let’s go over the best ways to serve and garnish your cheesecake for that extra wow factor.
How to Present No-Bake Banana Pudding Cheesecake Beautifully
Plating is everything when it comes to desserts. Here’s how to make your no-bake banana pudding cheesecake look just as good as it tastes:
- Chill Before Slicing – Make sure your cheesecake has been refrigerated for at least 4 hours (overnight is even better) before cutting. A chilled cheesecake holds its shape beautifully!
- Use a Warm Knife – Dip a sharp knife into hot water before slicing. Wipe it clean between cuts for smooth, even slices.
- Serve on Chilled Plates – This helps maintain the cheesecake’s cool, creamy texture longer.
- Layer for Elegance – If serving in individual glasses or jars, layer crumbs, cheesecake filling, and bananas for a stunning look.
- Pair with a Drink – A tall glass of iced coffee or a vanilla latte pairs wonderfully with the creamy banana flavor.
Pro Tip: Want picture-perfect slices? Run your knife under hot water, wipe it clean, then cut—each slice will look like it’s straight from a bakery!
The Best Garnishes for No-Bake Banana Pudding Cheesecake
Garnishing your cheesecake not only makes it look gorgeous but also adds extra layers of flavor. Here are some simple yet stunning topping ideas:
- Fresh Banana Slices – Lay them in a circular pattern on top for a classic look.
- Crushed Vanilla Wafers – Sprinkle on top for added crunch and texture.
- Whipped Cream Swirls – Pipe little clouds of whipped cream around the edges.
- Caramel Drizzle – A warm caramel sauce drizzle adds a rich, buttery sweetness.
- Chocolate Shavings – For a decadent touch, shave a dark chocolate bar over the cheesecake.
- Toasted Nuts – Crushed pecans or walnuts add a lovely nutty contrast.
- Mint Leaves – A small mint leaf on each slice gives a fresh, fancy finish.
Pro Tip: If adding banana slices on top, toss them in a bit of lemon juice to keep them from browning!
Looking for another irresistible dessert? Try our Strawberry Cheesecake Crunch Cake—it’s just as creamy and delicious!
Common Mistakes to Avoid When Preparing No-Bake Banana Pudding Cheesecake
Even the best recipes can go sideways if you’re not careful. Let’s go over some of the most common mistakes when making no-bake banana pudding cheesecake—and how to fix them!
Mistake 1: Not Letting the Cheesecake Set Properly
Patience is key when it comes to no-bake cheesecakes. If you don’t let it chill long enough, the texture will be too soft, and your slices will collapse.
Why it happens:
- You didn’t refrigerate it for at least 4 hours (overnight is best).
- The filling wasn’t thick enough before pouring it into the crust.
How to fix it:
- Always give it enough time to set—4 hours minimum, 8 hours ideal.
- If your filling is too runny before chilling, add an extra spoonful of pudding mix or whipped cream to help thicken it.
Pro Tip: If you’re really short on time, pop it in the freezer for 30-45 minutes before serving. Just don’t let it freeze solid!
Mistake 2: Using the Wrong Cream Cheese
Not all cream cheese is created equal! If your cheesecake turns out grainy or too soft, you might have used the wrong type.
Why it happens:
- You used low-fat or whipped cream cheese, which lacks the structure needed for a firm cheesecake.
- You didn’t let the cream cheese soften properly before mixing.
How to fix it:
- Always use full-fat, block-style cream cheese for the best results.
- Let the cream cheese sit at room temperature for about 30 minutes before beating to ensure a smooth texture.
Pro Tip: Never use spreadable cream cheese from a tub—it’s too soft and will make your cheesecake runny!
Mistake 3: Overmixing the Filling
While mixing is essential, overdoing it can lead to problems.
Why it happens:
- You beat the filling for too long, making it too airy.
- The whipped cream lost its fluffiness because it was overmixed into the batter.
How to fix it:
- Mix the cream cheese just until smooth—don’t over-whip.
- When folding in whipped cream, use gentle, slow motions to keep the filling light and fluffy.
Pro Tip: Think of folding whipped cream like handling a delicate soufflé—gentle and patient wins the game!
Mistake 4: Soggy or Crumbling Crust
Nothing’s worse than a crust that won’t hold together or one that turns into a mushy mess.
Why it happens:
- You didn’t add enough butter to bind the crumbs.
- The crust wasn’t chilled long enough before adding the filling.
- You used overly ripe bananas that leaked too much moisture.
How to fix it:
- Use the right butter-to-crumb ratio (6 tablespoons butter per 2 cups crumbs).
- Chill the crust for at least 30 minutes before adding the filling.
- If layering banana slices, make sure they’re just ripe, not too soft.
Pro Tip: Want an ultra-crisp crust? Brush it with melted white chocolate before adding the filling. It creates a barrier to keep it crunchy!
Mistake 5: Bananas Turning Brown Too Quickly
We all love fresh banana flavor, but nobody likes brown, mushy bananas ruining the look of their cheesecake!
Why it happens:
- Bananas oxidize (turn brown) when exposed to air.
- They were sliced too early and left out before serving.
How to fix it:
- Toss banana slices in lemon juice to prevent oxidation.
- Wait until just before serving to add banana slices on top.
- If layering bananas inside, coat them lightly with pudding to shield them from air exposure.
Bonus Hack: Want to keep your bananas fresh even longer? Store unpeeled bananas in a cool, dark place—not in the fridge!
Now that you know what not to do, you’re all set to make the perfect no-bake banana pudding cheesecake—without any stress!
Want to master even more dessert recipes? Check out our Peanut Butter Frosting Fudge Recipe for another creamy, no-bake treat!
With these serving tips and mistake-proofing tricks, your no-bake banana pudding cheesecake will be flawless, every single time! Enjoy every bite!
Best Side Dishes to Serve with No-Bake Banana Pudding Cheesecake
Serving a no-bake banana pudding cheesecake is already a treat, but pairing it with the right side dishes can elevate the entire dessert experience. Whether you prefer classic sides or want to try something unique, we’ve got you covered!
Classic Side Dishes for No-Bake Banana Pudding Cheesecake
- Fresh Fruit Salad
A colorful bowl of mixed berries, grapes, and pineapple complements the creamy richness of your cheesecake. The natural sweetness and acidity balance the dessert perfectly. - Vanilla Ice Cream
A scoop of creamy vanilla ice cream adds an indulgent touch. It pairs wonderfully with the banana flavor and enhances the smooth texture of the cheesecake. - Whipped Cream and Mint
Top your cheesecake with a dollop of whipped cream and a sprig of fresh mint. The cool, light texture of the whipped cream contrasts beautifully with the dense cheesecake. - Espresso or Coffee
A small cup of strong espresso or coffee is a classic pairing. The bitterness cuts through the sweetness and cleanses the palate between bites.
Unique Side Pairings to Try
- Caramelized Banana Slices
Sauté ripe banana slices in a bit of butter and brown sugar until caramelized. Serve them warm alongside your cheesecake for a boost of banana flavor and a delightful texture contrast. - Toasted Coconut Chips
For a tropical twist, sprinkle toasted coconut chips on top. They add a crunchy texture and a subtle coconut flavor that complements the banana perfectly. - Salted Caramel Sauce
Drizzle a bit of salted caramel sauce over each slice. The sweet and salty combination enhances the creamy cheesecake and adds a touch of elegance. - Nutty Granola
For an unexpected crunch, serve your cheesecake with a side of homemade granola. The nuts and oats bring a hearty contrast to the smooth filling.
Pro Tip: Want to add a savory touch? A small cheese board with mild cheeses like brie and crackers can create a surprising yet delicious pairing.
For more delicious dessert ideas, check out our Cottage Cheese with Fruit Recipes. It’s a healthy, refreshing option perfect for your next meal!
Healthier Alternatives and Dietary Considerations
If you’re looking to enjoy no-bake banana pudding cheesecake without all the guilt, here are some healthier options and ingredient swaps you can try.
Low-Calorie and Nutrient-Packed Options
- Greek Yogurt Instead of Cream Cheese
Swap out some of the cream cheese for Greek yogurt. It cuts down on fat and calories while still maintaining a creamy texture. - Almond Milk Instead of Whole Milk
Use unsweetened almond milk in the pudding mix. It’s lower in calories and adds a subtle nutty flavor. - Stevia or Honey Instead of Sugar
Replace granulated sugar with natural sweeteners like stevia or honey. They reduce the calorie count and add a unique sweetness. - Oat Crust Instead of Vanilla Wafers
For a fiber boost, use a crust made from oats and coconut oil instead of traditional vanilla wafers. It’s healthier and still holds together well.
Ingredient Swaps for a Healthier No-Bake Banana Pudding Cheesecake
- Low-Fat Cream Cheese: Opt for low-fat versions to reduce calories while maintaining the classic cheesecake taste.
- Coconut Cream: Use coconut cream instead of heavy whipping cream for a dairy-free, lower-fat option.
- Banana Puree: Increase the banana content by adding mashed bananas to the filling. It adds natural sweetness and moisture, reducing the need for extra sugar.
Healthy Tip: Incorporate chia seeds into the crust for added fiber and omega-3s!
Vegetarian and Vegan Variations of No-Bake Banana Pudding Cheesecake
Even if you’re following a vegetarian or vegan diet, you can still enjoy a delicious no-bake banana pudding cheesecake. Here’s how to keep it plant-based without sacrificing flavor.
Plant-Based Ingredient Substitutions
- Vegan Cream Cheese and Coconut Milk
Use vegan cream cheese and coconut milk in place of traditional dairy ingredients. The coconut milk adds a creamy texture and subtle flavor. - Banana Pudding Mix
Choose a vegan banana pudding mix or make your own using cornstarch, mashed bananas, and plant-based milk. - Agave Syrup Instead of Sugar
Replace sugar with agave syrup or maple syrup for a natural sweetener that keeps the dessert vegan-friendly. - Vegan Butter for the Crust
Use vegan butter or coconut oil to bind the crust instead of traditional butter.
Keeping the Flavor Without Meat or Dairy
- Cashew Cream: Blend soaked cashews with lemon juice and vanilla extract to create a creamy, dairy-free filling.
- Tofu: Silken tofu can be used as a base for a light, fluffy vegan cheesecake.
- Plant-Based Gelatin: Use agar-agar as a setting agent instead of traditional gelatin.
Storing, Reheating, and Pairing No-Bake Banana Pudding Cheesecake
The Best Way to Store Leftovers
Store your no-bake banana pudding cheesecake in an airtight container in the fridge. It will stay fresh for up to 3 days. For longer storage, wrap individual slices in plastic wrap and freeze for up to 1 month.
How to Reheat Without Losing Flavor
Since no-bake cheesecake is meant to be served cold, reheating isn’t usually necessary. However, if you prefer it slightly warmer, leave it at room temperature for 15 minutes before serving.
Pro Tip: Avoid microwaving! It can ruin the texture and make the filling too soft.
Perfect Pairings for No-Bake Banana Pudding Cheesecake
- Herbal Tea: A cup of chamomile or mint tea complements the sweetness and aids digestion.
- Sparkling Water: For a refreshing palate cleanser, pair your cheesecake with a glass of sparkling water with a lemon twist.
- Dessert Wine: A light, fruity dessert wine like Moscato enhances the banana and vanilla notes.
With these simple tips, your no-bake banana pudding cheesecake will be perfect for every occasion—whether it’s a casual family dinner or a fancy dessert party!
Want to explore more no-bake treats? Check out our Lemon Cream Cheese Dump Cake for a tangy twist on a classic dessert.
Enjoy your baking journey and the delicious results!
Frequently Asked Questions (FAQs) about No-Bake Banana Pudding Cheesecake
If you’re making no-bake banana pudding cheesecake for the first time, you might have some questions. Here are the most common ones—answered with easy tips and tricks!
Do no-bake cheesecakes taste different?
Yes, they do—but in the best way possible!
No-bake cheesecakes are lighter and creamier compared to baked cheesecakes, which tend to be dense and firm. Because they don’t require eggs or baking, they rely on ingredients like cream cheese, whipped cream, and pudding mix to create a smooth, velvety texture.
Tip: If you love the rich taste of baked cheesecake but want the ease of no-bake, try using full-fat cream cheese and a little Greek yogurt for extra tang and body.
Why won’t my no-bake cheesecake set?
If your no-bake banana pudding cheesecake is too soft, one of these might be the culprit:
- Not enough chilling time – No-bake cheesecakes need at least 4 hours in the fridge, but overnight is ideal.
- Overmixing the filling – Too much mixing can make the filling runny. Fold in whipped cream gently instead of beating it in.
- Too much liquid – Make sure to use instant banana pudding mix instead of the cook-and-serve variety. Also, don’t add extra milk beyond what’s needed.
Fix it: If it’s still too soft, pop it in the freezer for 30-60 minutes before serving to firm it up quickly.
What keeps bananas from turning brown in banana pudding?
Bananas naturally oxidize when exposed to air, which makes them turn brown. Here’s how to keep them fresh and bright:
- Toss them in citrus juice – A little lemon, lime, or pineapple juice helps slow oxidation.
- Layer them inside the cheesecake – Burying banana slices inside the filling keeps them from air exposure.
- Wait until serving time – If adding banana slices as a topping, do it just before serving.
Bonus Hack: Brushing banana slices with a light layer of honey can also prevent browning while adding a hint of sweetness!
Is it better to bake or not bake a cheesecake?
It depends on what you’re looking for!
- No-bake cheesecakes are quicker, easier, and creamier. They’re great for warm weather or when you don’t want to deal with an oven.
- Baked cheesecakes are denser and richer, with a classic New York-style texture. They require eggs and precise baking techniques but result in a firmer dessert.
Best of both worlds: If you love the idea of a firmer texture, let your no-bake cheesecake chill overnight for the perfect balance between creamy and set!
Looking for more creamy dessert ideas? Check out our Peanut Butter Frosting Fudge for another no-bake delight!
Conclusion
Final Thoughts on No-Bake Banana Pudding Cheesecake
If you’ve made it this far, you now have everything you need to create the perfect no-bake banana pudding cheesecake! From a crunchy vanilla wafer crust to a smooth, banana-infused filling, this dessert is the ultimate crowd-pleaser—and best of all, it’s super easy to make.
Remember, the key to success is patience—let it chill properly, use high-quality ingredients, and don’t be afraid to get creative with toppings and mix-ins. Whether you serve it at a party, bring it to a potluck, or make it for a cozy night in, this cheesecake is guaranteed to be a hit.
Where to Go Next?
Now that you’ve mastered this recipe, why not try another delicious no-bake dessert? If you loved the flavors in this cheesecake, you’ll definitely enjoy our Strawberry Cheesecake Crunch Cake—it’s just as creamy and indulgent!
We’d love to hear how your no-bake banana pudding cheesecake turned out! Drop a comment or share your photos—let’s spread the love for easy, delicious desserts.
Table of Contents
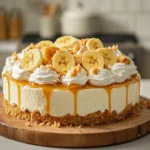
No-Bake Banana Pudding Cheesecake: How to Make It Perfect Every Time
- Total Time: 4 hours 15 minutes (includes chilling time)
- Yield: 8–10 servings 1x
- Diet: Vegetarian
Description
This no-bake banana pudding cheesecake is the perfect combination of creamy cheesecake and classic banana pudding flavors! Made with a crunchy vanilla wafer crust, a rich banana-infused filling, and topped with fresh banana slices and whipped cream, this dessert is easy to make and requires no baking at all. Perfect for summer gatherings, holiday desserts, or just a sweet treat at home. Try this quick and delicious recipe today!
Ingredients
For the Crust:
- 2 cups vanilla wafers (crushed)
- 6 tbsp unsalted butter (melted)
For the Cheesecake Filling:
- 16 oz (2 blocks) full-fat cream cheese (softened)
- ½ cup granulated sugar
- 1 small box (3.4 oz) instant banana pudding mix
- 1 cup whole milk
- 1 tsp vanilla extract
- 1 cup heavy whipping cream (whipped to stiff peaks)
- 2 ripe bananas (sliced)
For Toppings:
- 1 cup whipped cream
- ½ cup crushed vanilla wafers
- 1 banana (sliced, for garnish)
- Caramel drizzle (optional)
Instructions
Step 1: Make the Crust
- Crush the vanilla wafers in a food processor or by placing them in a ziplock bag and rolling with a rolling pin.
- Mix the crushed wafers with melted butter until fully combined.
- Press the mixture firmly into the bottom of a 9-inch springform pan.
- Chill in the refrigerator for 30 minutes to set.
Step 2: Prepare the Cheesecake Filling
- In a large bowl, beat the cream cheese with an electric mixer until smooth.
- Add sugar and vanilla extract, and mix until fully combined.
- In a separate bowl, whisk together the banana pudding mix and milk until it thickens. Let sit for 5 minutes.
- Gently fold the pudding into the cream cheese mixture until smooth.
- Carefully fold in the whipped cream to keep the mixture light and fluffy.
- Fold in sliced bananas for extra banana flavor.
Step 3: Assemble and Chill
- Spread the cheesecake filling evenly over the chilled crust.
- Cover with plastic wrap and refrigerate for at least 4 hours (overnight is best).
Step 4: Add Toppings and Serve
- Before serving, top with whipped cream, crushed vanilla wafers, and fresh banana slices.
- Drizzle with caramel sauce if desired.
- Slice, serve, and enjoy your delicious no-bake banana pudding cheesecake!
Notes
- For best results, refrigerate the cheesecake overnight to allow flavors to meld and the texture to fully set.
- If you don’t have vanilla wafers, you can substitute graham crackers or digestive biscuits for the crust.
- To prevent bananas from turning brown, toss them in a little lemon or pineapple juice before layering.
- This cheesecake can be frozen for up to 1 month. Just wrap it tightly in plastic wrap before freezing.
- Make it gluten-free by using gluten-free vanilla wafers or graham crackers.
- Prep Time: 15 minutes
- Cook Time: 0 minutes (No-bake recipe)
- Category: Dessert
- Method: No-Bake
- Cuisine: American
Nutrition
- Serving Size: 1 slice
- Calories: 507 kcal
- Sugar: 30.2 g
- Sodium: 264 mg
- Fat: 37.2 g
- Saturated Fat: 22.2 g
- Unsaturated Fat: 14.2 g
- Trans Fat: 0.3 g
- Carbohydrates: 40.3 g
- Fiber: 1.0 g
- Protein: 5.6 g
- Cholesterol: 106 mg
Keywords: no-bake banana pudding cheesecake, banana cheesecake, easy cheesecake recipe, banana pudding dessert, no-bake dessert, creamy cheesecake, quick cheesecake recipe
